 February
15
February
15
Tags
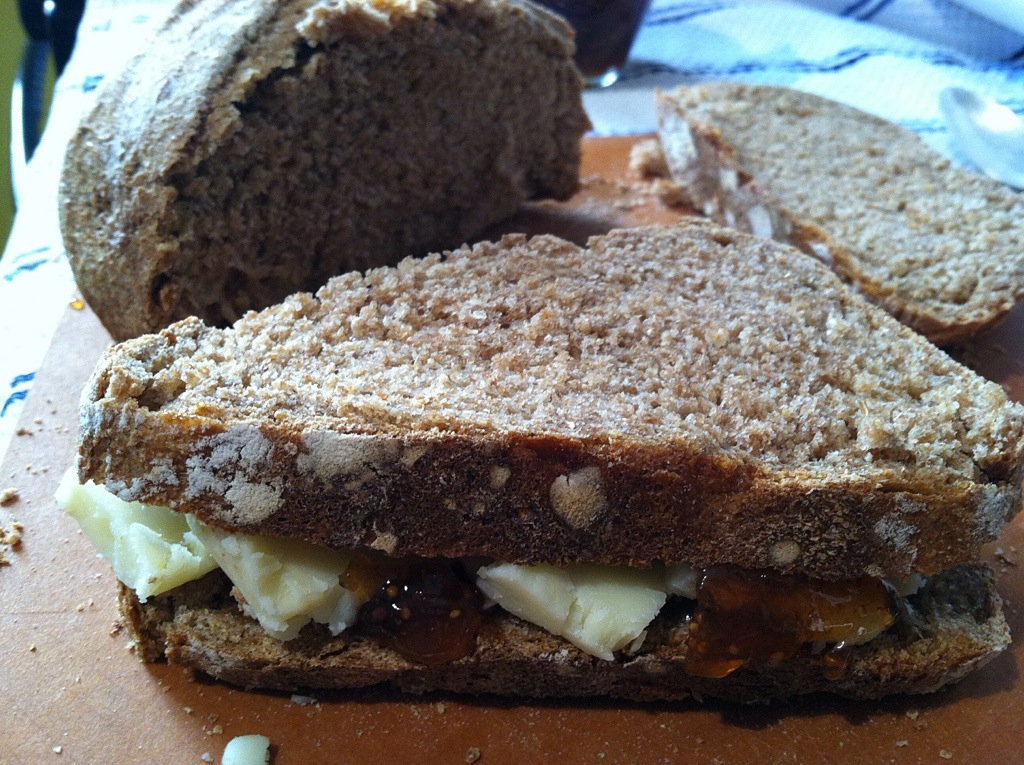
Vermont Cheddar Wheat Bread and Croatian Fig Spread Sandwich
Here’s something sweet and savory for this weekend. Luckily, it’s also cheap (less than $1.50 each!) and relatively simple: just fresh cheese bread, cheddar slices and fig spread.
For a fast, easy version: Just buy a crusty loaf of whole wheat peasant bread (bonus if you can find one with cheese in it), and heat it in your oven at 300˚-325˚ til it’s fully warm to the touch. My total guess would be about 10 minutes.
But if you have time, you can’t beat oven-fresh bread. Heaven! So I adjusted the Vermont Cheddar Bread recipe in my new bible, Artisan Bread in Five Minutes A Day, subbing in organic whole wheat flour—the hard red wheat kind, not white wheat or soft wheat—for the all-purpose flour.
The trick for subbing in hard red wheat flour for regular flour? Weigh the flour instead of measuring level cups so that you use the right amount of wheat flour (which is powdery than regular flour). Thanks to Erica Lea, her Cooking for Seven blog and my kitchen scale, I subbed 5.5 oz. wheat flour for every 1 cup of regular flour.
WHOLE WHEAT VERMONT CHEESE BREAD
35.75 oz. organic whole wheat flour
1.5 T. organic yeast
3 cups lukewarm water (I always filter my New York tap water)
1.5 T. salt
1.5 T. organic sugar
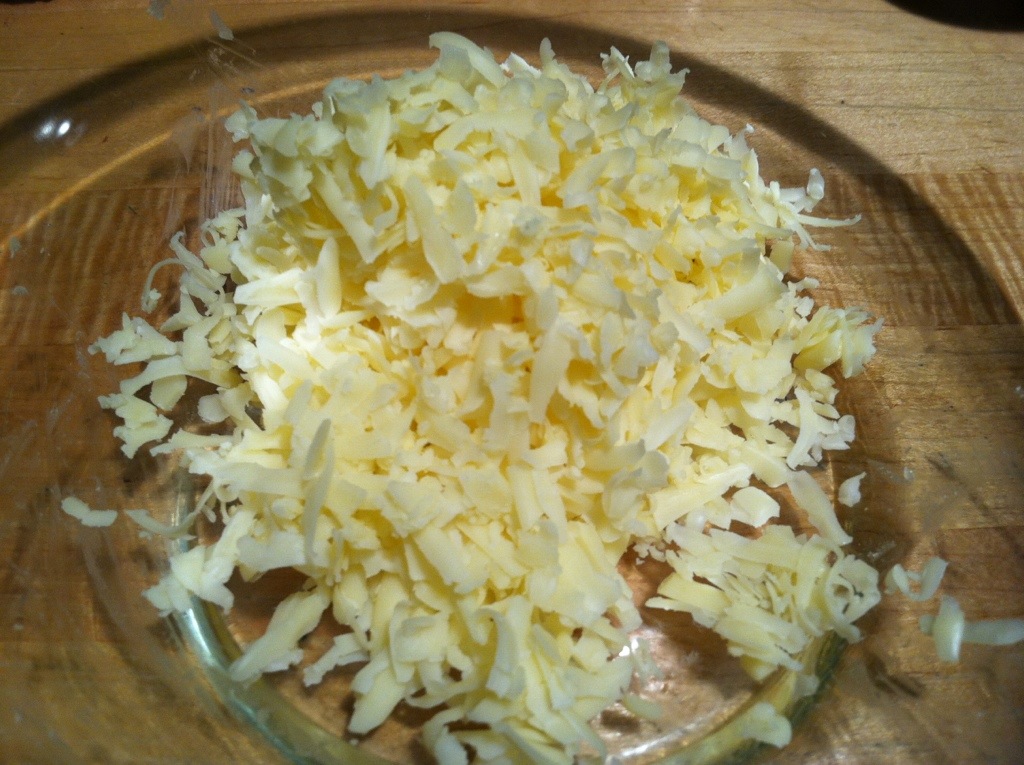
1 c. grated extra sharp cheddar cheese
organic all-purpose flour for dusting
Cost: Just a pinch over $7.50.
If you don’t have a scale, you can try to wing it by using 6.5 slightly rounded cups of whole wheat flour, adding a touch more flour if the dough is too wet, or adding a touch more water if the dough is too dry.
The night before baking, I mixed the yeast, salt and sugar with the water in a large lidded (but not airtight—i.e., no Mason jars!) container. I let this stand for 20 minutes to get the yeast going, and shredded the Cabot’s extra sharp white cheddar leftover from last week’s Sandwich Surprise, the Cheesy Creamed Corn Egg and Bacon Sandwich.
Then I mixed in the dry ingredients and the cheese with a spoon. I incorporated the last stubborn bits with my hands—wetting them first and also adding a tablespoon or two of water to the dough because there was a little dry flour left—while being careful not to overwork it.
After covering the container—it’s a Tupperware-like rectangular plastic bin—by lightly resting the lid on top, but not actually sealing it, I let it rest for 2 hours until it rose and then flattened on top. (I forgot to take a picture, oops.)
Off to the refrigerator overnight, still with the lid resting on top but not sealed.
To bake a loaf the next morning, I dusted the top of the dough and pulled off about 1/5 of it into a nearly 1 lb., grapefruit-sized chunk, then shaped it into a ball using the King Arthur Flour blog technique (pinching the sides of the bottom down and then rolling that lightly in the palm of my hand).
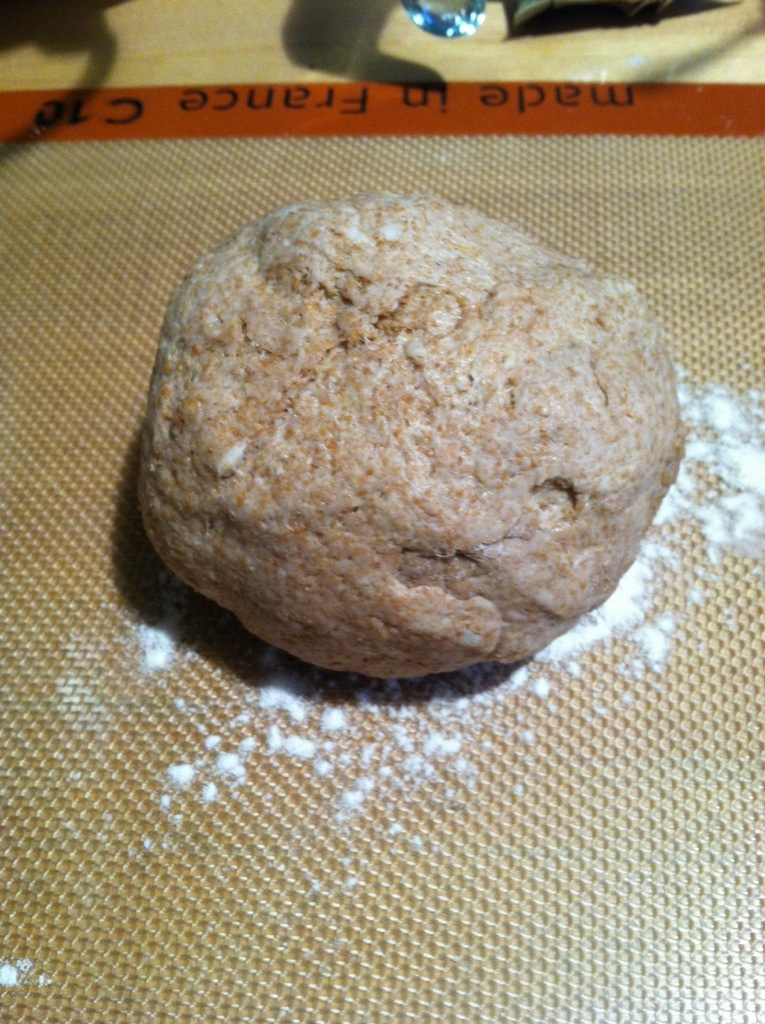
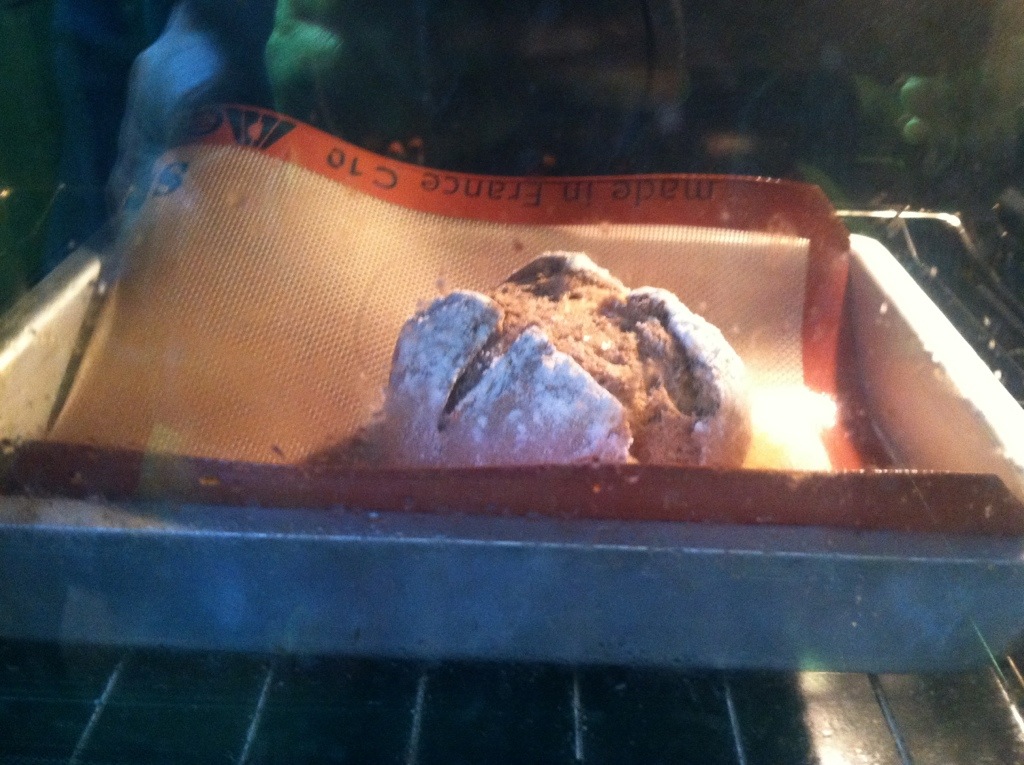
I let it rest and rise for an hour. You’re supposed to place it on a cornmeal-dusted pizza peel (one of those wooden boards with a long handle that you see in pizzerias). But I was winging once again it without proper equipment: I don’t have a pizza peel or a baking stone yet. So instead, I put the ball on a Silpat baking pad lightly dusted with flour. (I doubt the Silpat needs the nonstick help, but I wanted the bottom of the bread to have some flour dust on it.)
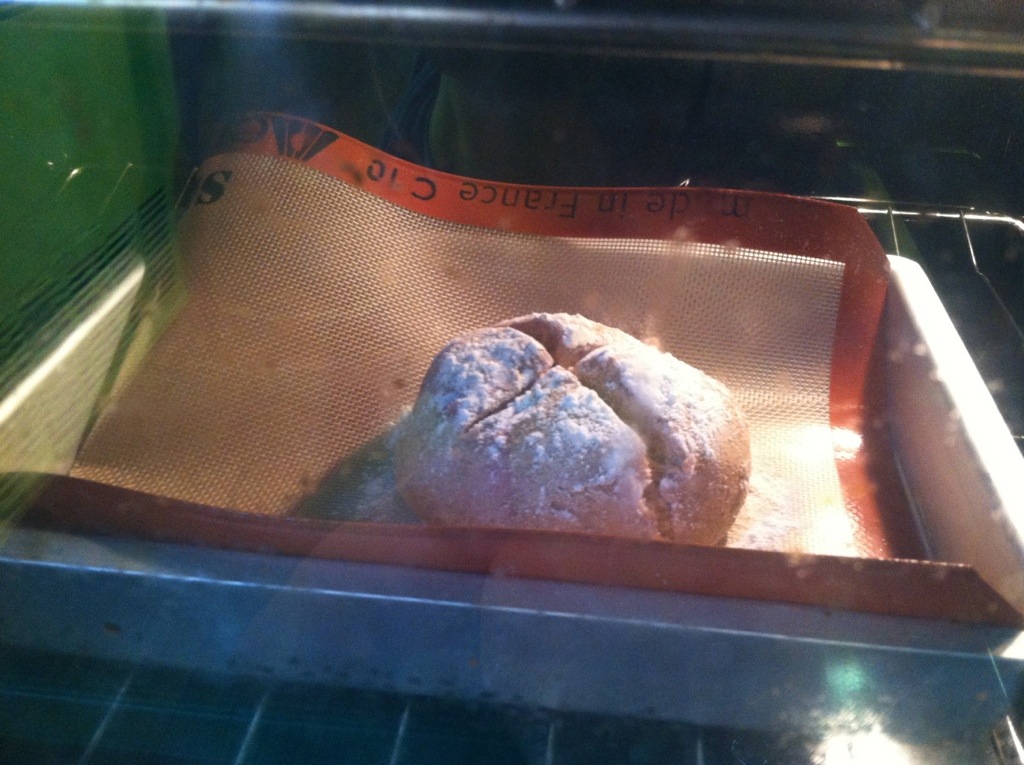
I found out thanks to my over thermometer (about $12) that my oven takes twice as long to reach the proper temperature than its beeps indicate, so I preheated it to 450˚ about 40 minutes before baking. I also placed a broiler pan on the rack not being used for the bread, per the book.
The ball wasn’t rising fast enough for my liking, so I moved the ball, still on the Silpat, to the stove top to get some of the residual oven heat. Hmmm. After an hour, it hasn’t risen much. Maybe my wheat flour substitution wasn’t a good idea?
Anyway, I put the dough and Silpat in a baking pan and stuck it in the oven. I also poured a cup of water in the broiler pan, per the book, to create a steam effect.
Early morning brain: I forgot to flour the top and then score it with a serrated bread knife. The bread was already in the oven for 3 minutes when I remembered, so I could feel the crust on top already starting to form.
At least it smelled delicious baking.
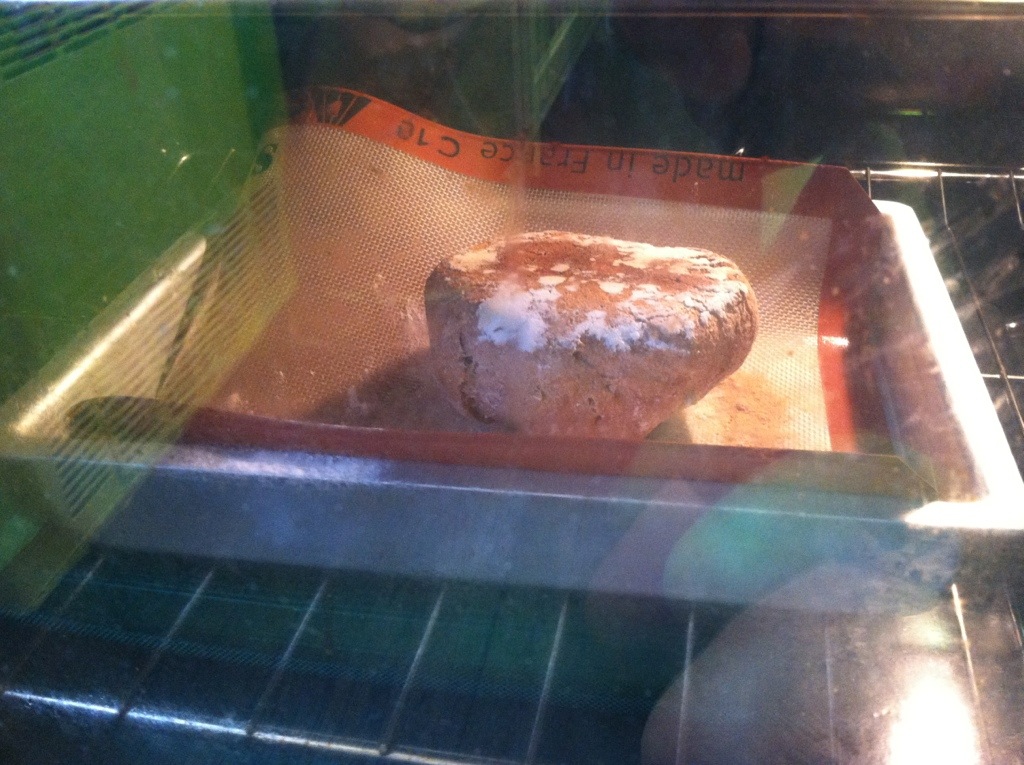
I baked it for 25 minutes, then I flipped it over and baked it for another 10 minutes because the bottom was browning faster than the top. Your oven might bake faster, so make sure to keep an eye on your loaf so it doesn’t burn!
Letting cool enough until I could hold the loaf comfortably, I used the serrated bread knife to cut 1/4″ slices, and then I smeared 1 T Organic Adriatic Fig Spread on two slices …
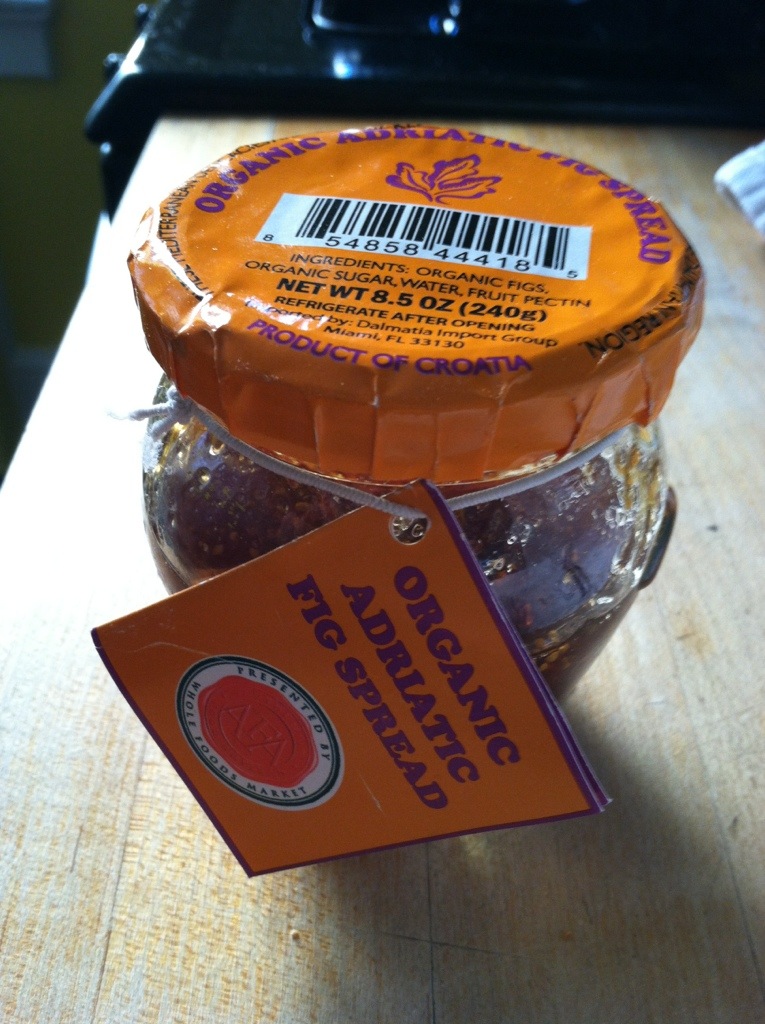
(Got it on sale at Whole Foods for $5.99 a while ago, but I’m seeing it online for $19.95. Eek!)
… and put this much cheddar on top:
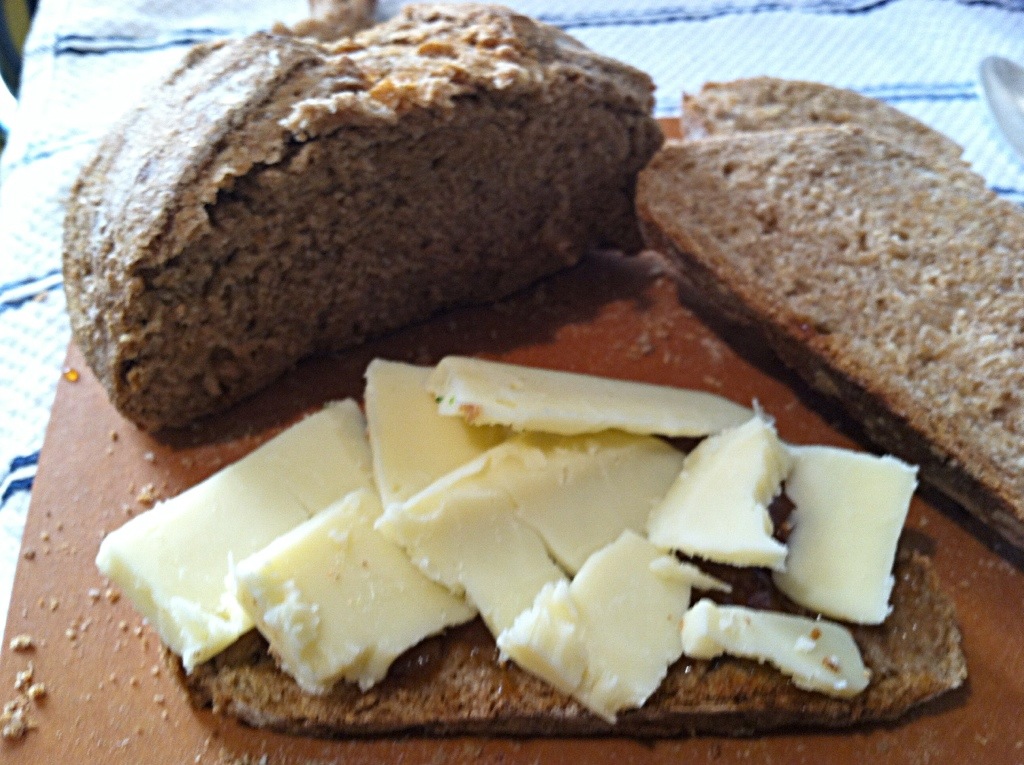
I didn’t melt the cheese, because I wanted a slightly cold gnaw in the sandwich to offset the warm, chewy bread. But this would make a delightful grilled cheese.
My verdict: Delicious. Especially for the price. Even without a baking stone, the bread had a perfectly crunchy crust. Alas, I only had enough cheese for one sandwich, and I am still sad I’m not in the middle of snacking another one.
However, the bread isn’t as cheesy as I hoped it would be. The added slices of cheddar offset that nicely, but I wonder if adding 1/2 to 1 cup more would be a good plan. And next time, I’ll make larger loaves for bigger sandwich servings.
Also, with cheddar being one of three star ingredients, a higher quality cheddar might be in order. Maybe later today, I’ll try it with the cheddar from Beecher Cheese Shop on Broadway and 20th St. Mmmm.
Of course, you can add all sorts of things to this: proscuitto, cornichons, whatever you like. I just wanted something simple today. But I’d love to hear what you’d add!


Sounds unreal!
What a great snack! This was some of the freshest bread I have ever had.The croatian-fig-spread-sandwich was delish! At first I was reluctant to try a jam and cheese combo but I was pleasantly surprised!
Yay, so glad you liked it! We were thinking it would also be great with apricot or blackberry jam. It may be a new bus-to-Atlantic-City tradition. 🙂
Update: Not so great with blackberry jam. But I’m still betting that apricot would be good with it.